On boats with a holding tank for waste there is a vent line. Most of these vent lines have a filter. The filters have a limited life. If the filter becomes wet, the tiny carbon pellets inside the filter no longer do their job.
Fill gauges for holding tanks are often inaccurate. We overfilled our holding tank. After that we got an odor with each flush.
You can spend about $100 on a new filter or you can modify and recharge your existing filter for about $10. Once you modify the filter you can do future recharges for about $5.
Here is a do it yourself guide for recharging your holding tank filer.
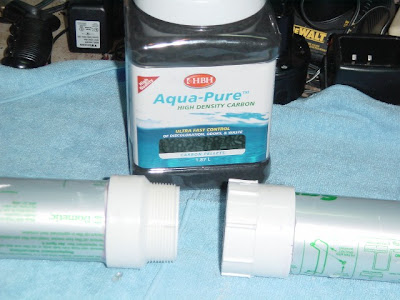
Step 1. Buy a 2” PVC male and female fitting, primer & glue at a hardware store like Home Depot. At a pet supply store buy a 900 ML container of carbon pellets. These are the same pellets they sell for fish tank filters.

Step 2. Locate the filter on the boat and remove. Follow the vent line from the holding tank. The filter will be between the holding tank and the vent fitting on the side of the boat close to the pump-out fitting.
In the picture below the filter is located directly above the holding tank. Take note how the filter is mounted. You will be cutting this filter in half and adding the fittings. You want to make sure you cut the filter in a location where the fittings will not interfere with the way the filter needs to go back into the hardware that holds the filter. You do not need to cut the filter in the center.
Step 3. Using a hack saw cut the filter in half. Empty the contents into the trash
Step 4. Remove the retainer pads from each end. Wash and rinse the filter and retainer pads. Let the retainer pads dry.
Step 5. Carefully peal away about 1” of the label on the filter with a knife or razor bade so the fittings will slide on over the PVC filter pipe.
Step 7. Use the primer and glue per the instructions on the label to glue the fittings into the filter. Allow time for the glue to set-up.

Step 7. Replace the retainer pads to each side of the filter. Add the carbon pellets to the filter filling both both sides full then close the filter tight.
Step 8. Replace the filter in the boat. You just saved about $100. Next season you can simply buy a container of the carbon pellets and do this entire project at the marina.
About this guide:
I first came across this idea at a online forum called Club Sea Ray. I’ve modified the original instructions after doing this project myself, but must give credit to Ken for posting this money savings do-it-yourself maintenance item with the above pictures. Here is a link to the original post. Link
The above information was prepared by Presentation Rentals a audiovisual equipment rental company in Appleton Wisconsin that offers LCD projector PA public address sound system and accessories. Visit them on the web at http://www.presentationrentals.net/
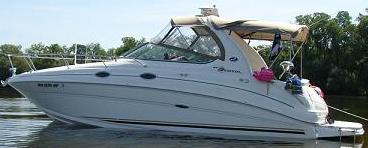
Boat - SeaRay 280 Sundancer
Port - Slip #2A, Skipper Buds, Oshkosh, WI
Lisa & Doug


1 comment:
Thank you for your instruction. I overflowed my waste tank and 2 weeks afterward a horrible smell omitted from the vent. I googled my problem and this solution came up. My 23 yr old 27ft Cierra Bayliner had no filter so I built my own from your instructions for about $20. We breath easier and saved money enough for 20 gallons of gas. Thanks again.
Post a Comment